Showing posts with label All Posts. Show all posts

Banana Cake/Bread

Banana bread/cake. Sooooo yum and refined sugar free! 

Easiest recipe ever.... 

- 3 ripe bananas.
- 2 tablespoons of fresh apple juice (I use "nudie apple juice" which is pure apples from the local supermarket).

- 125g of unsalted butter.
- 2 eggs.
- 250g self raising flour (I use wholemeal).
- 1/2 teaspoon ground cinnamon.
- 2 tablespoons of honey (I use raw only).
- 2 tablespoons of white chia seeds.
- 50-100g pecan nuts chopped.


1) Preheat oven to 180C (350F). Grease a loaf tin with oil then dust with flour shaking out the excess.
2) Mash bananas with a fork so they are smooth and chunky then add apple juice mixing through.
3) In another bowl cream the butter then add one egg at a time until thoroughly combined.
4) Fold in flour, cinnamon, honey, pecans and banana mixture.
Don't over mix this.
5) Pour into loaf pan and cook for about 40 minutes or until cooked through. 


You can check it's cooked by placing a skewer into middle and if it comes out clean your banana bread/cake is done.
Cool in pan for about 15minutes then carefully tip out onto a wire rack. 


Eating your banana bread/cake warm is definitely the best or you can even toast it and have it with butter.


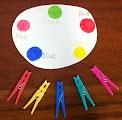


Fun way to teach colours.

Making it fun is always a winner!

I just used a piece of white cardboard and cut into an oval shape (which was up cycled from the cardboard label when I bought a new mattress protector).
Coloured pegs from the supermarket and then I drew the coloured circles on and wrote the name of each colour beside it. My kids love this.

- Lay it all out as pictured and get your kids to place the pegs on the correct colour.

- OR TO BE TRICKY- place the pegs on an incorrect colour dot so they can swap them over to the correct colour.


Fine Motor Skills & Hand Eye Co-ordination.

Threading is the most popular and effective fine motor skill activity for young children. Threading is also fantastic for their hand-eye co-ordination. This is a simple and easy yet effective activity to do with your munchkins.
Use your vegetable steamer and grab some pipe cleaners or even wool would work. Thread the pipe cleaners through the holes, you can also make patterns going back and forth.

Teach your child their address- VERY IMPORTANT!

Knowing their address is generally a good thing to know, after all, it's where they live. It is great for their cognitive (thinking) skills, helps with their memory and is fantastic for learning numbers, letters & words.
As well as learning about their town, state and country.
This is especially important in the unlikely event they could get lost or separated from you.
Well there you go.... the benefits are endless of knowing their address.

Use a piece of paper and write down the following (as pictured)
"We live at
1 Lake street
Town/City
Queensland Post/ Zip code"


Laminate it and pop up on a wall in your child's play area.


Then your part as the adult is to go over and over and OVER your address again and again and AGAIN!


Hard work.... not really, time consuming.... not really, but remembering to do this often.... yes, that is the hardest part.


We have taught our kids their address at 2.5 years old by continuously going over it. And I don't mean at the one time in just an hour of repeating yourself.


- I mean as we are driving home, I will say "Oh we are just about home, we are nearly at 1 Lake street, Rainbow Town".
- Then when Daddy gets home from work I say "Let's tell daddy where we live.... it's 1 Lake street, Rainbow town".
- At different times through the day I will say "remember we live at 1 Lake street, Rainbow town".


It was less than a week when our kids started telling us our address themselves. It is super cute hearing a 2 year olds tell you where they live.

Save time when cooking dinner by pre-cooking.

This tip will save you time when it matters most. Not that we have much spare time as busy parents, but when you have half hour to set aside or even better.... set the kids up with one of the activity ideas on this blog to give you half an hour then follow this idea to shorten dinner preparation time.

This can be done with other vegetables also.
I made up about 20 bags - so for 20 meals. They are perfect to throw into a stir fry or casserole, or even just for steaming to have on their own. The cooking time is halved and all the prep work is done, making the crazy meal time of an afternoon a lot less stressful.
  • Cut carrots into serving size, we wash thoroughly and leave the skin on.
  • Blanche the carrots by cooking to approximately 50% cooked, we did about 5minutes steamed over boiling water.
  • Immediately remove from heat and place carrots into a bowl or sink of cold water- this stops them cooking any further.
  • Lay them out to dry on paper towel or a clean tea towel.
  • Once dry, place into serving size in plastic zip lock bags or freezer bags.


Upcycling... Small & Medium size Boxes.

Upcycling is the process of converting waste materials or useless products into new materials or products of better quality or for better environmental value.

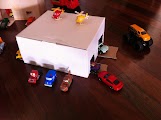
Just as I was about to throw this tissue box out, I thought how awesome it would be for my kids to use as a hideaway for their cars. And boy was it a hit!

Cut flaps out on one side or a couple, it's totally up to you.

Only cut three sides so you can push it back up to close the flap; that is part of the fun, then you can hide the cars away.

WOHOO!!!!!!!!!!!!!!!!!!!!!!!!!!!!!!!!!!!!!!!!!!!!!!!!!!!!!!!!!!!!!!!!!!
Finally I can reveal that I have some awesome news and I'm super excited to share with you all.

I HAVE FINALLY STARTED MY OWN BUSINESS, SOMETHING IM VERY PASSIONATE ABOUT & BEEN WAITING A LONG TIME TO GET STARTED. I WOULD LOVE FOR YOU ALL TO SUPPORT ME AND LIKE MY PAGE AND PLEASE PASS ON MY LINK TO ALL YOUR FAMILY & FRIENDS.........
 https://www.facebook.com/healthyfitkids
 
If you are not on Facebook,
 

I HAVE A NEW WEBSITE COMING. "HEALTHY FIT KIDS".


The HEALTHY FIT KIDS website is currently being designed and with the help of a graphic designer it will be AMAZING!

In the meantime I will run the Facebook page and provide information, thoughts, tips, facts and photos to make sure you have Healthy Fit Kids.


Once the website is up and running I will add a link to the site here on my blog. 
 
For those NOT ON FACEBOOK HERE IS WHAT ITS ABOUT:
 

Here's some points to explain it all until my company website is up and running.


 - Yes this is my new job, so I can be at home with my children and work on my husbands days off and at night.
- In the future I will be selling items involved with keeping kids healthy & fit.
- I will be writing a book (and/or eBook), which although is still a while away, I am currently collecting information and in discussion with publication companies.
- I would like to run programs through primary schools in the future working with students, teachers & parents, although this will be once my own children are at school.
- Most importantly- being a mum and wife is still my number one job and priority.


I will share healthy & delicious food photos, recipes or meals each week. Get creative and give them a go or you can marvel at the amazing creations people can make with simple ingredients we all have in our fridges and cupboards at home.


LET'S GET MOVING! Each week I will be providing a variety of physical activities, sports, movement games and exercises that will help get the kids moving and being fit.... and in a fun way of course

 Thanks guys.... make sure you follow my journey from the start and "like" my page and please pass my link onto your friends and family so we can all have healthy fit kids!
Warm Regards and love
Kate xo

MAGNETS - Home Made & Personalised

   
We all have them.... You know that random collection of magnets on your fridge from business' that you have accumulated over the years?! If you are like me, I have very rarely looked at these for the actual details on them, really they just become holders for whatever I want stuck on the fridge.
Now with this great idea they are gone and we have fun, funky and kid friendly magnets instead, although still using the same old magnets from before.

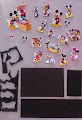
Get stickers of the kids favourite characters. For this I will show our "Minnie & Mickey" magnets.
 
I placed the stickers all over the old magnets making sure I utilised as much of the magnet as possible by laying the stickers down as close to one another as I could.


Then cut around the stickers in the shape of the character.
DONE, ITS THAT EASY!
FUN & FUNKY MAGNETS!
PS. If you do need the contact details of some of the companies on the magnets, don't forget to add them to your address book before you start this activity.

Happy 2nd Birthday K.A.T.E

It is now 2 years since the creation of this blog and my very first post
http://kidsactivitiesandtipsforeveryday.blogspot.com.au/2012/02/well-its-my-first-morning-of-blogging.html
NOW................
- 160 posts
- over 30,000 visits
- a facebook page
- and a pinterest page later, I'm still having fun with my little hobby- this blog.
Thanks for joining me and checking it all out.

Christmas placemats & Coasters using Christmas cards

Each year we keep the Christmas cards we think are adorable to cut out and use for arts & crafts the following Christmas. This year we decided to make placemats and coasters.

They were fun, easy and inexpensive- the perfect activity :-)


Home made I SPY GAME

These are fun to make as you can design it however you want and either make random ones like I have or make them with a theme (particular colours, sea creatures, animals, assorted shape buttons).

GREAT FOR THE CAR when going on long trips.

Fantastic for cognitive (thinking) skills. Great for your children's memory and concentration.

I chose 20 random objects (avoid sharp things due to piercing bag) and then I laid them onto paper, ruled lines then placed an item in each section and took photos.

I edited photos by cropping onto a word document and printed it out just from my home printer.

Laminate to keep protected, put a hole punch in the corner then pop through a key ring.

I placed all objects into a zip lock bag once I had taken photos, then added rice to fill loosely, still giving room for the rice to be moved around.

Superglue the top closed where you zip it closed, put a whole punch in corner of bag, then join with picture card you have laminated.

All done.... yes it's a bit of work, but I enjoyed making it. It's easy, just a little time consuming with a few steps.

I spy with my little eye....................

Thank you to my sister for giving me this idea :-)

Quote of the day!

Cous Cous Salad

One of my favourite Salads /dishes to make anytime of the day and great for the typical Aussie Barbie.

You can really mix whatever you fancy, but I put:
  • 1 cup of uncooked Cous Cous (follow instructions on pack to make).
  • 3-4 Shallots chopped.
  • 10 Mushrooms chopped (can be raw or cooked in a saucepan with some coconut oil first, then added).
  • 1 red capsicum (or 1/2 red and 1/2 green) chopped.
  • Bacon chopped (optional) If you are putting bacon, crisp it up in a saucepan first with coconut oil.
  • Peas and Corn (optional)
Mix all together and ENJOY!!!!!! Can be served warm or cold.

Prepare your children for EMERGENCIES 000 or 911

You can start this from about 2 years old (although 3 years old they will have a better concept of what you are saying). I have made this sign up to help my younger ones and just to remind my older child. It is so important and I can not stress enough that ALL children should know how to call 000 or 911 or whatever emergency number your country has.


As a firefighters wife and daughter, I have seen families go through devastating situations and unfortunately some could have possibly had a different outcome if the children had just known this information.

Emergencies can happen to anyone at anytime, please remember that.

I have taught the kids that if Mummy or Daddy were ever hurt and couldn't talk or had fallen and hurt themselves and were not answering them, to pick up the phone (which we have in their reach but hidden away enough that they forget about it during the day) to call 000 (three 0's) and then push the ladybug on the phone.

I have super glued on the ladybug stickers so they will not be coming off. I have also put a ladybug on the poster after the three 0's to remind them.

Of course you do not want to freak out or panic your children when talking about this topic, so make sure you are sitting quietly with no distractions and calmly explain that this is a way of keeping your family safe. Explain that it is to talk with police, ambulance and firefighters.

When the 000 call is made, you are asked if you would like police, fire or ambulance. If a child is on the end of the phone and not sure of this, this is not a problem as the person taking these calls has been trained and will make sure that all emergencies services needed will be dispatched.

I have explained to my older child to just say what has happened, so "my mummy/daddy wont wake up" or "there is a fire in our house". Then tell your child that the lady/man will ask questions and they can answer these to get help.

It is also important that your child knows
  • their name
  • their surname
  • their address
  • their parents names
  • their telephone number also, although this can be trickier to learn, still go over it each week and eventually they will learn it.
BY 4 YEARS OLD, YOUR CHILD NEEDS TO EITHER KNOW OR BE LEARNING THESE DETAILS LISTED ABOVE ABOUT THEMSELVES.

PLEASE NOTE: I have written 000 or 911 as they are the emergency numbers I know for Australia (000) and America (911). I am not sure of other countries emergency numbers.

Learning DAYS of the week

Just one fun way to spend time with your children and teach them the days of the week. Oh and we LOVE the Woolworth's song- "Monday Tuesday Wednesday...... I love you", that has really helped us. I have attached the link  http://www.youtube.com/watch?v=e7iT8XzR7G0

You will need:
  • Paper
  • Textas (markers)
  • Stickers
  • Ruler
  • Laminate pouches and laminator
Click here to see my Season and Date Calendar Wheel

Fridge organisation

Keeping your fridge organised seems to be one of the things people wish they could do better, or just do at all. For us, I use to start organising our fridge the day shopping arrived and then as things were returned to the fridge, they slowly hour by hour and day by day become cluttered, messy and then I'd lost where I had put the butter again.
I am now trying this approach and so far it seems to be working. It's been a couple of months and I'm happy to continue taking an extra 30 minutes after my shopping day to save hours through the week.

When I get the vegetables out of the shopping bag, I am immediately washing them and cutting them into cooking size and then popping into a big 7litre container. 3 of these fit perfectly along the bottom shelf of our fridge. I separate different things into these containers from vegetables, fruit, yoghurt's, and leftovers. I do leave certain vegetables whole as we all love carrots, just eating them raw and whole. We go through a bag each week just snacking on carrots, so I cut some and leave a lot whole. I also like to keep Kale in a bunch as I make Kale chips.

I now use the crisper for fruit. As we live in Queensland, our fruit doesn't seem to last long being out on the bench, so we put it in the fridge, specifically the crisper. This way, older children can easily grab out fruit anytime they want- be my guest kids! :-)

Doing this not only gives me more time during the week with my family and less stress at dinner time but it also means I use all of our vegetables up and I don't have waste anymore. These containers keep them fresh. You can also pop a piece of paper towel along the bottom to soak up excess moisture which will prolong the life of the vegetables too.

As I have small children at home with me, when I am about to do all this washing and chopping of vegetables I set up a game for the kids, something that hasn't been out already. Try keep a few things packed away so when you need to distract the kids for a bit, you have something "new" as a novelty. Or if it's been a busy day and they have been out, I will pop on a movie or play school. Anything to give me half an hour where I can get this done as it then saves me hours during the week, which means more time with the kids.

Halloween

Just a few ideas I have enjoyed making for my kids. If you don't have time for Halloween day itself, the kids will still enjoy all of this on the weekend.

I made my own "Halloween matching pairs" game. I found pictures I liked, then printed them out twice and laminated them into squares.
Please note: when I cut the squares of laminate, I always round the edges as they can be quite sharp for little ones if you leave them square.

I also raided our balloon pack for orange only and made my own "pumpkin balloons".

I printed out my favourite "colouring in pages".

Once I had a few bits and pieces, I added them all to a party (loot) bag which I already had. So the kids have it all in their own little bag. Or you could buy one of those Halloween buckets from a variety store or your local supermarket.

Don't forget "orange food" for morning tea like carrots, peaches, orange jelly, cheezels, oranges, burger rings, mandarins and steamed pumpkin.

HAPPY HALLOWEEN EVERYBODY!!!!

LAMINATOR- my essential item as a mum

If there is one item I would highly recommend buying as a parent, it would be a laminator. On special they can be as cheap as $15-$20.

They can be used for so many projects, activities and for gifts.

Once the kids create their master pieces, laminate them and they are a perfect gift for grandparents, family and friends as a placemat or a bookmark.

I also always laminate art work my kids have done which are really important to me or a favourite of theirs. One day I want to look back at the first time they drew a person, wrote their name or wrote "to mummy", these are the ones I have made sure are laminated to protect them as my treasures.

When making bookmarks:
  • Cut out paper the shape you want the bookmark. Be creative, make different shapes like hearts, squiggly snakes, zigzags, stars.
  • Get the kids to draw on one side.
  • Stick photos of the kids on the other side.
  • Hole punch the top and add some ribbon.
These make beautiful and very special gifts.

Yummiest Accidental Smoothie- now a favourite!

Just throwing a few ingredients I had which I thought may be nice, turned out to be sooooo yummy! Now a favourite recipe of mine and super healthy.
  • Almond milk to suit your taste, I put about 2 cups.
  • 2 really ripe bananas
  • 2 tablespoons of Vanilla protein powder
  • 1 tablespoon of Flaxseed meal
- As we do not eat refined sugar, this is more than sweet enough for us with the bananas as they are naturally sweet, but if you are a sweet tooth, you can add honey or maple syrup.

- Mixed in my blender and then served in a cold glass.

- I keep a glass in the fridge so when its smoothie time I can have it extra chilled, so good in summer, well great all year round when you live in Queensland :-)

Best Dip I have ever made!

Perfect anytime for any age. Easy to whip up when you need to take a plate to someone's house. I have made this nearly every day this week. Much healthier than bought dips from the supermarket.

Next shopping trip grab-

*2 large Avocados (you will be keeping skins to use as bowls)
* 500g tub of cottage cheese
* 4 shallots (thinly slice these)
* Juice of 1/2 lemon
* Salt and pepper to taste
* Pack of thin wraps (I use wholemeal mountain bread square wraps)
* Olive oil
  1. Warm oven to about 180 Celsius (350 Fahrenheit).
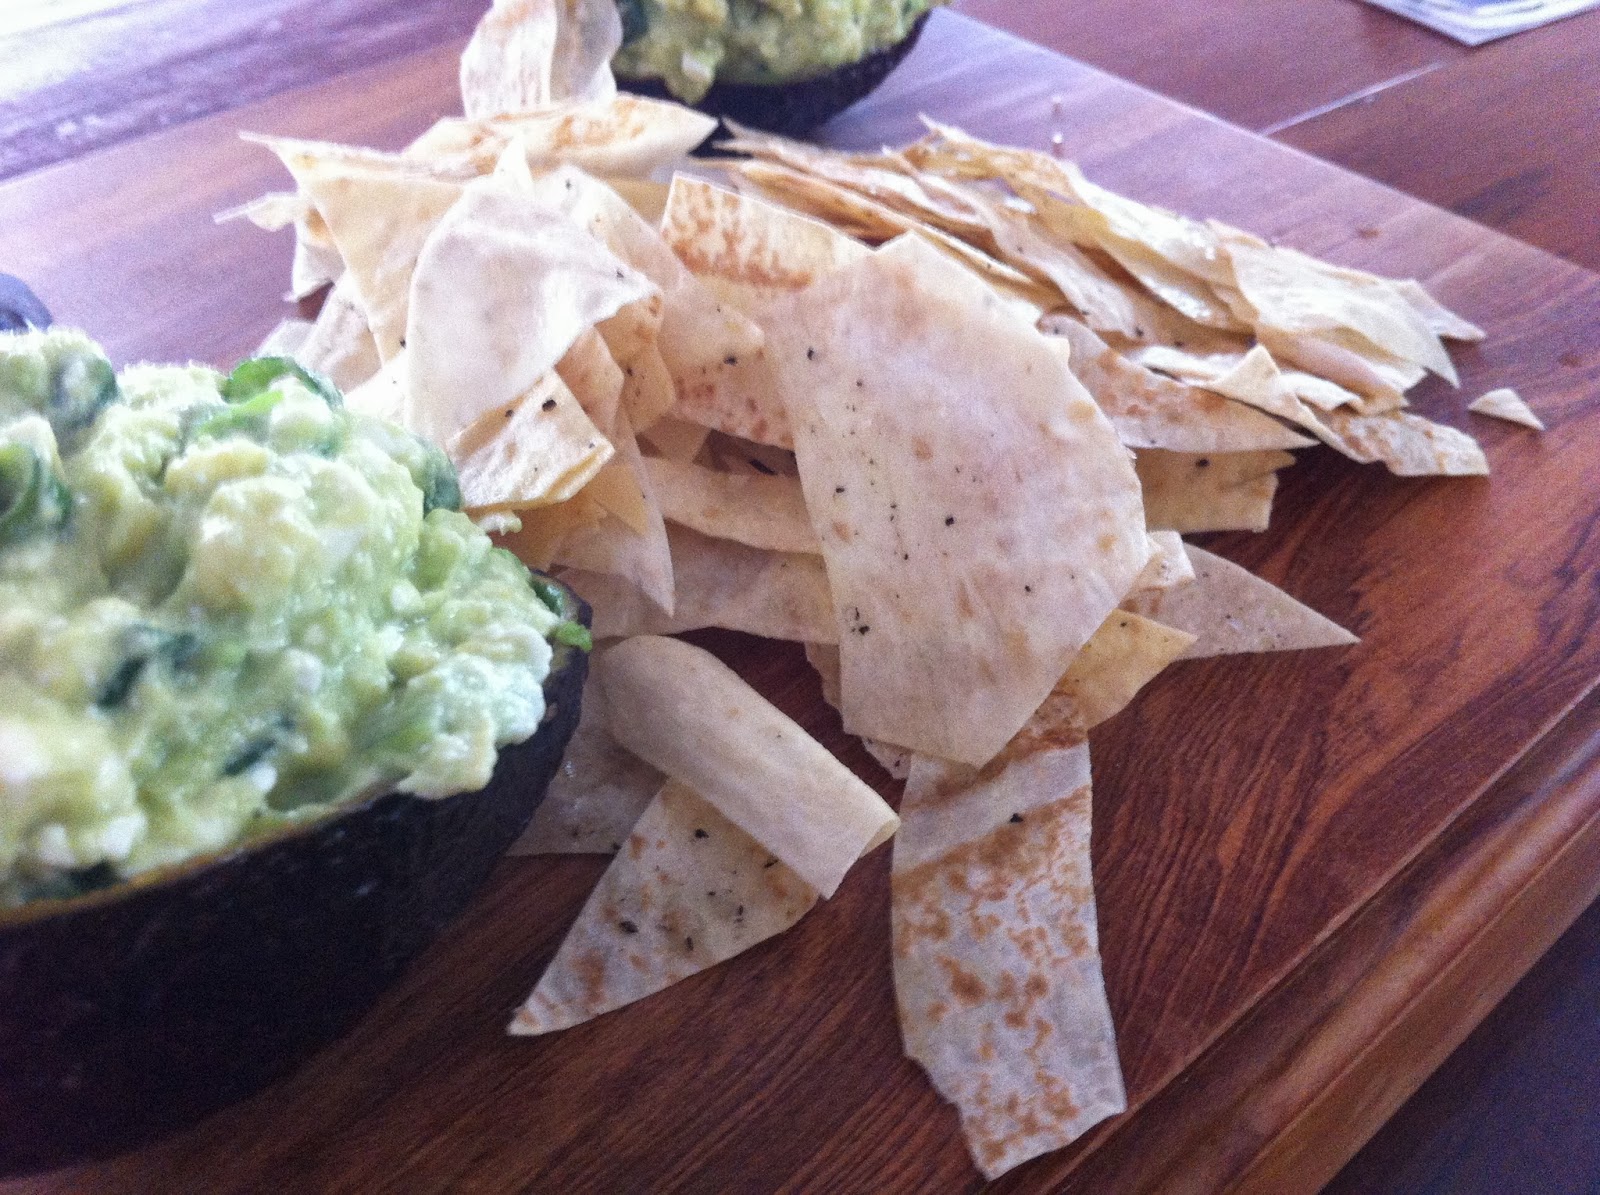
  2. Cut wraps into random shapes, the messier looking the better. Place roughly on a baking tray, doesn't matter if they overlap heaps.
  3. Drizzle a little olive oil over the top and season with salt and pepper.
  4. Heat in oven for about 10mins until they have gone crisp (keep an eye on them as they are easy to burn).

While you wait the ten minutes for the bread to cook, make your dip.
  1. Slice avocado in half long ways and keep skins as these will be your bowls.
  2. Mash the avocado then mix together with cottage cheese, shallots, juice and salt/pepper.
  3. Scoop mixture back into avocado skin.  
This should be quick and easy to whip up, if not, your not being messy enough. ENJOY :-)